Setting up your Oxla Cloud cluster
In order to connect Apache Airflow with Oxla Cloud, you need to have a running cluster. If you don’t have one yet, you can easily create it by following our step by step Oxla Cloud: Quickstart Guide.
-
If you already have an existing cluster, that you want to use with Airflow, click the three dots next to it and select Start
-
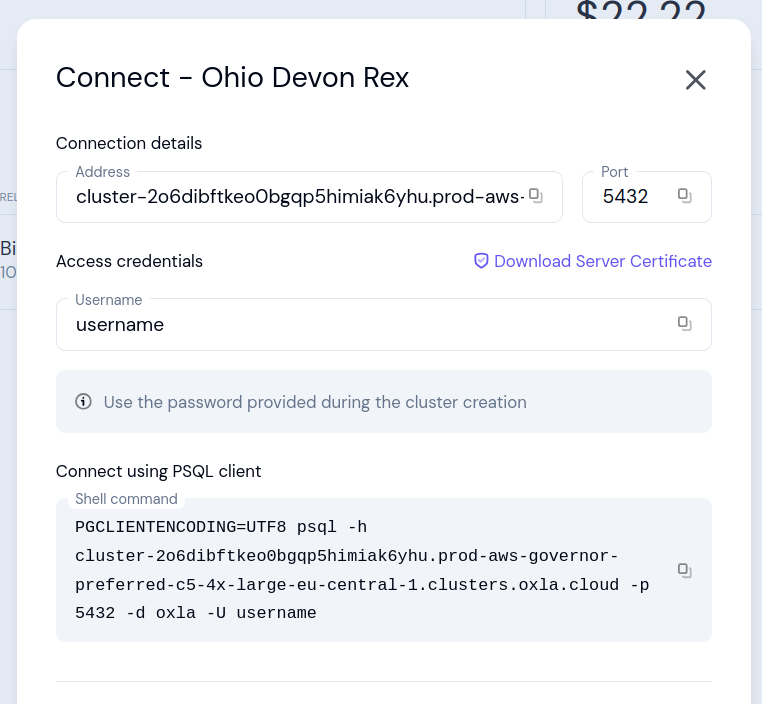
To view the connection details please select Connect info from the menu available next to the running cluster:
- Address: cluster address
- Port: port number
- Username: username of the user / role that has access to the cluster
- Server certificate: certificate of the server that you can download to be uploaded to the Certificate Store if needed
Connecting Apache Airflow with Oxla Cloud
Now, that you’ve successfully gone through Oxla Cloud cluster creation flow and have its connection information, it’s time to set up Airflow
-
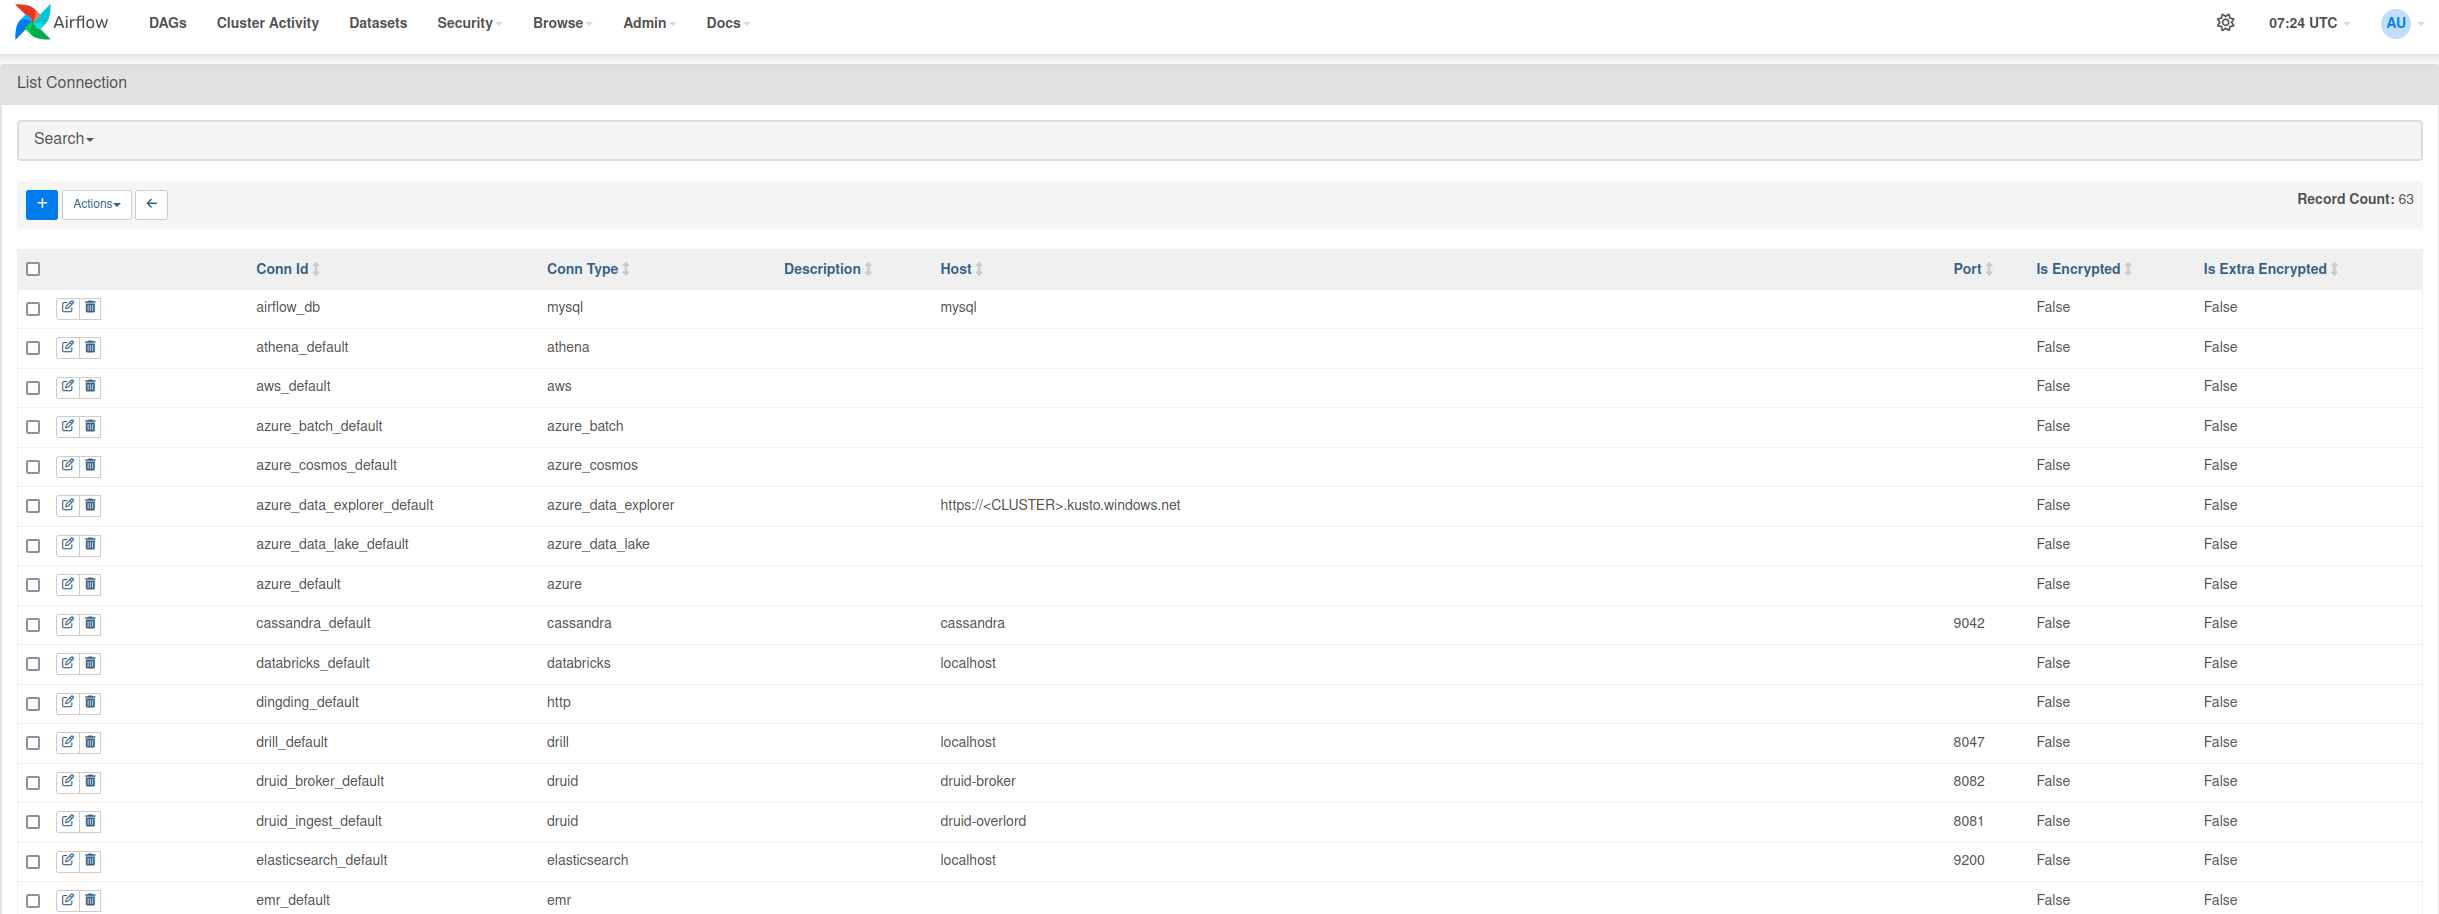
Firstly, go to Airflow Connections screen which can be accessed through Admin dropdown menu
-
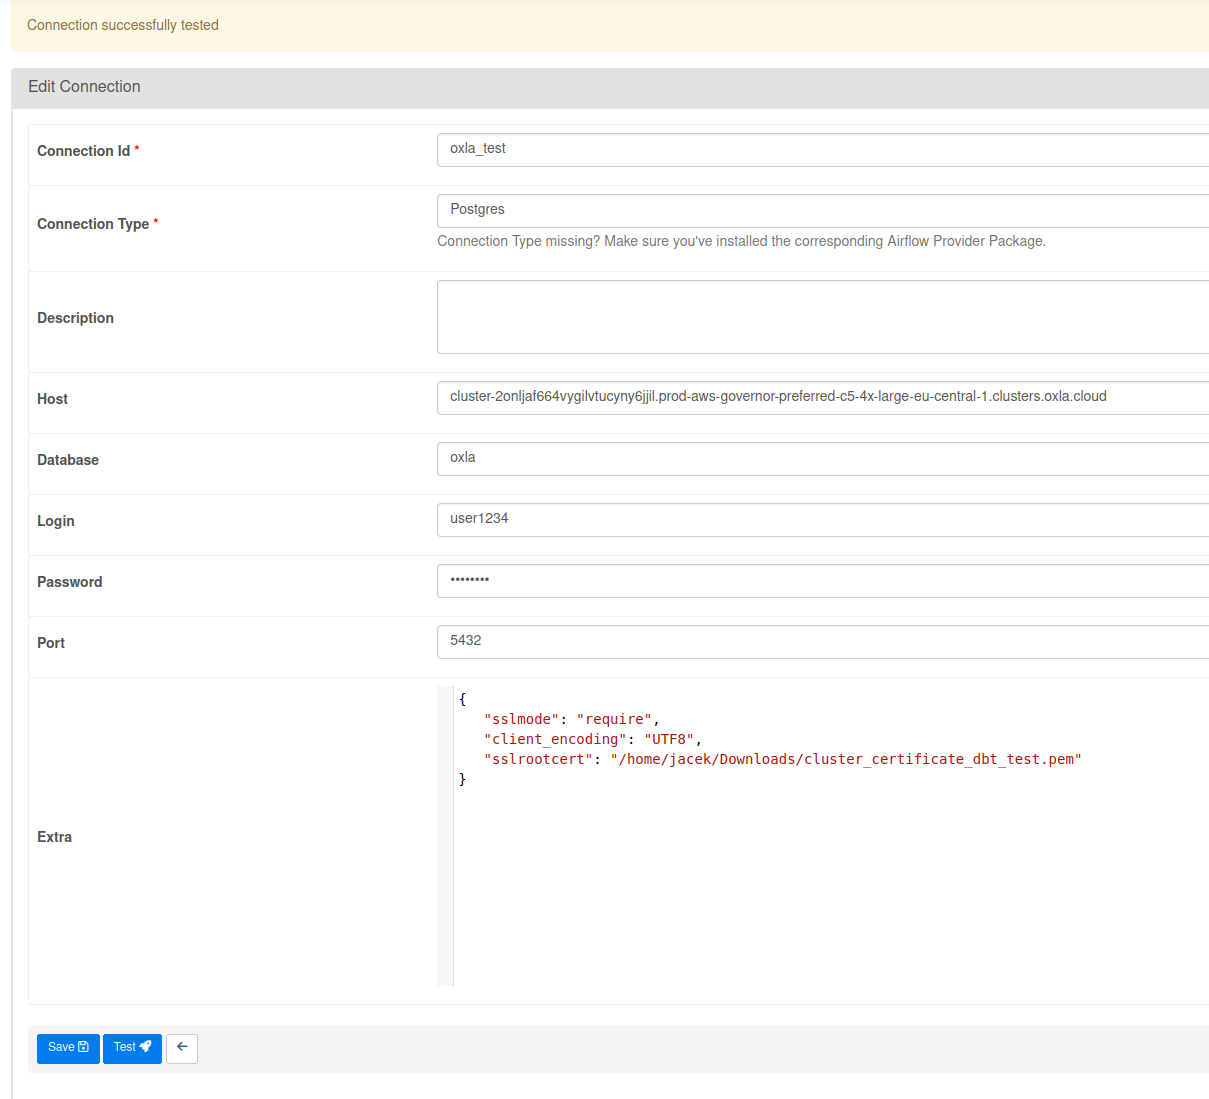
Press the blue button with a + sign to add new record and fill in the form
That’s it! Oxla can now be used in your Apache Airflow DAGs
Example DAG using Oxla
In this section, you can find an example DAG using Oxla, which works the following way:
- Processes files with names starting with
NEW_ in a specified directory
- Renames the newest file by removing the
NEW_ prefix
- Dynamically generates a table name
- Transforms the data by calculating additional column (
date_of_birth)
- Creates a new Oxla table with the generated name
- Loads the transformed data into the table
from airflow import DAG
from airflow.operators.empty import EmptyOperator
from airflow.operators.python import PythonOperator
from airflow.operators.postgres_operator import PostgresOperator
from airflow.hooks.postgres_hook import PostgresHook
from datetime import datetime
import json
import pandas as pd
import glob
import os


# Helper function to safely load JSON strings
def debug_json_load(x):
    """
    Safely parses a JSON string. If parsing fails, it returns an empty dictionary.
    Logs errors for invalid JSON inputs.
    """
    try:
        return json.loads(x) if x and isinstance(x, str) else {}
    except json.JSONDecodeError as e:
        print(f"Error parsing JSON: {x}")
        return {}


# Task to check for new data files and prepare metadata
def check_if_data(**kwargs):
    """
    Checks for files in the specified directory that start with 'NEW_'.
    - Renames the newest file to remove the 'NEW_' prefix.
    - Pushes the renamed file's path and a dynamically generated table name to XCom for later tasks.
    """
    files = glob.glob(os.path.join("/airflow/dags", "NEW_*"))

    if files:
        # Get the most recently modified file
        newest_file = max(files, key=os.path.getmtime)

        # Rename the file, removing the 'NEW_' prefix
        new_filename = os.path.join("/airflow/dags", os.path.basename(newest_file).replace("NEW_", ""))
        os.rename(newest_file, new_filename)

        # Push the new filename and a dynamically generated table name to XCom
        kwargs['ti'].xcom_push(key='filename', value=new_filename)
        print(f"Renamed {newest_file} to {new_filename}")
        table_name = 'data_' + datetime.now().strftime('%Y_%m_%d_%H_%M_%S')
        print(f"Table name will be: {table_name}")
        kwargs['ti'].xcom_push(key='table_name', value=table_name)
    else:
        print("No files starting with 'NEW_' found in the directory.")

# Task to create a new table in Oxla
def create_table(**kwargs):
    """
    Creates a new Oxla table using a dynamically generated name.
    The table schema includes columns for the data to be ingested.
    """
    # Retrieve the table name from XCom
    table_name = kwargs['ti'].xcom_pull(task_ids='check_if_data', key='table_name')

    if table_name:
        # Define SQL for creating the table
        create_table_sql = f"""
        CREATE TABLE {table_name} (
            id INT,
            metadata JSON,
            some_date TIMESTAMP,
            age INT,
            date_of_birth TIMESTAMP
        );
        """
        # Execute the SQL command using PostgresOperator
        postgres_operator = PostgresOperator(
            task_id="create_table",
            postgres_conn_id="oxla",
            sql=create_table_sql
        )
        postgres_operator.execute(context=kwargs)
        print(f"Table {table_name} created.")
    else:
        print("No table name found, skipping table creation.")


# Task to load d and transform data into Oxla
def load_data(**kwargs):
    """
    Loads data from the renamed file into an Oxla table.
    - Extracts file and table names from XCom.
    - Reads the CSV file into a DataFrame and processes its columns.
    - Transforms the 'metadata' JSON column to compute additional fields.
    - Inserts the transformed data into the specified Oxla table.
    """
    # Retrieve the file name and table name from XCom
    filename = kwargs['ti'].xcom_pull(task_ids='check_if_data', key='filename')
    table_name = kwargs['ti'].xcom_pull(task_ids='check_if_data', key='table_name')

    if filename and table_name:
        # Read the CSV file into a pandas DataFrame
        df = pd.read_csv(filename, delimiter=";")
        df['metadata'] = df['metadata'].apply(debug_json_load)

        # Transform: Calculate the date of birth based on the 'age' field in 'metadata'
        current_date = datetime.now()
        df['age'] = df['metadata'].apply(lambda x: x.get('age') if isinstance(x, dict) else None)
        df['date_of_birth'] = df['age'].apply(lambda age: current_date.replace(year=current_date.year - age).strftime('%Y-%m-%d'))

        # Load: Insert the transformed data into Oxla
        pg_hook = PostgresHook(postgres_conn_id='oxla')
        conn = pg_hook.get_conn()
        conn.autocommit = True
        cursor = conn.cursor()

        for index, row in df.iterrows():
            cursor.execute(f"""
                INSERT INTO {table_name} (id, metadata, some_date, age, date_of_birth)
                VALUES (%s, %s, %s, %s, %s)
            """, (row['id'], json.dumps(row['metadata']), row['some_date'], row['age'], row['date_of_birth']))
        cursor.close()
        conn.close()
    else:
        print("No new files")


# Define the DAG structure
with DAG(
        'etl_example',
        description="example",
) as dag:
    # Empty operators for marking the start and the end of the pipeline
    start_pipeline = EmptyOperator(task_id='start_pipeline')
    end_pipeline = EmptyOperator(task_id='end_pipeline')

    # Define tasks
    check = PythonOperator(
        task_id='check_if_data',
        python_callable=check_if_data
    )

    create = PythonOperator(
        task_id='create_table',
        python_callable=create_table
    )

    load = PythonOperator(
        task_id='load_data',
        python_callable=load_data
    )

    # Set task dependencies
    start_pipeline >> check >> create >> load >> end_pipeline
id;name;metadata;some_date
1;John Doe;{"city": "New York", "age": 30};2023-11-18
2;Jane Smith;{"city": "Los Angeles", "age": 28};2023-11-17
3;Bob Johnson;{"city": "Chicago", "age": 40};2023-11-16
4;Alice Brown;{"city": "Miami", "age": 35};2023-11-15
5;Chris Green;{"city": "Dallas", "age": 25};2023-11-14